Install the widget on any website
Add the chat widget to any website by pasting one <script> tag. This works for static HTML, server-rendered pages, and site builders or CMSs that let you add custom code before </body>.
Before you begin
Section titled “Before you begin”- Create your site in the admin panel.
- Add every hostname your pages are served from under Site Settings > Allowed domains. The widget doesn’t appear on any other domain.
- Add some content, so the assistant has something to answer from.
Copy your embed snippet
Section titled “Copy your embed snippet”-
Sign in to app.agentmysite.com.
-
Select Site Settings in the sidebar. Under Site key & embed snippet, select Copy.
You can also copy the same snippet from the Dashboard.
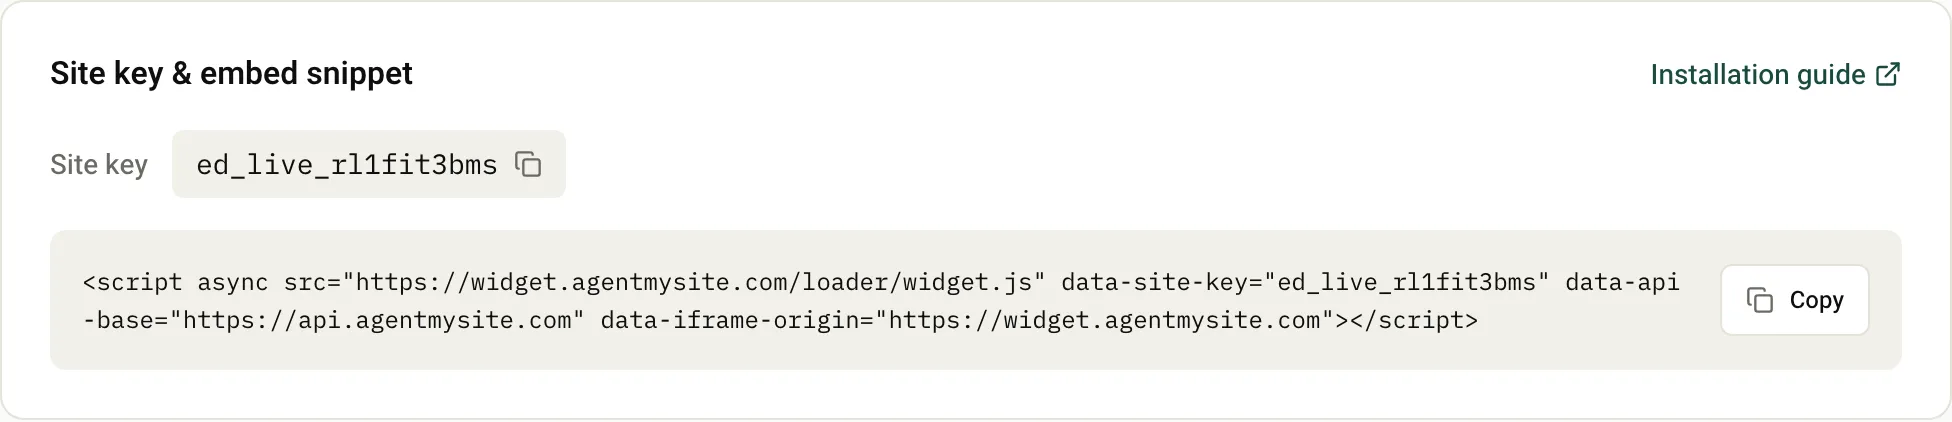
The snippet looks like this, with your own site key in place of YOUR_SITE_KEY:
<script async src="https://widget.agentmysite.com/loader/widget.js" data-site-key="YOUR_SITE_KEY" data-api-base="https://api.agentmysite.com" data-iframe-origin="https://widget.agentmysite.com"></script>Copy it from the admin panel rather than retyping it, so the site key is exact.
Add the snippet to your pages
Section titled “Add the snippet to your pages”-
Open the HTML template that’s shared by all your pages, such as a layout, footer include or theme file.
-
Paste the snippet just before the closing
</body>tag:index.html <body><!-- your page content --><script async src="https://widget.agentmysite.com/loader/widget.js" data-site-key="YOUR_SITE_KEY" data-api-base="https://api.agentmysite.com" data-iframe-origin="https://widget.agentmysite.com"></script></body> -
Publish your changes.
To show the widget on only some pages, paste the snippet on those pages only.
The script loads asynchronously, so it doesn’t slow down your page.
Check that it works
Section titled “Check that it works”-
Open a page on one of your allowed domains. A chat button appears in the bottom-right corner.
-
Select it and ask a question your content answers.
-
In the admin panel, the Dashboard shows Widget installed after the widget starts on an allowed domain for the first time.
If the button doesn’t appear, see Troubleshooting.
Snippet attributes
Section titled “Snippet attributes”The snippet from the admin panel already has the required values. You can add the optional attributes yourself.
| Name | Type | Default | Description |
|---|---|---|---|
data-site-key Required | string | — | Your site key, from the admin panel. Without it the widget doesn't load. |
data-api-base | URL | https://api.agentmysite.com | The AgentMySite API the widget talks to. Keep the value from your snippet. |
data-iframe-origin | URL | the value of data-api-base | Where the chat window loads from. Keep https://widget.agentmysite.com from your snippet; if you remove it, the chat window can't load. |
data-customer-id | string | — | Optional. Your own ID for a signed-in visitor, shown with their conversations in the admin panel. |
data-customer-name | string | — | Optional. The signed-in visitor's name, shown in Conversations. |
data-customer-email | string | — | Optional. The signed-in visitor's email address, for your reference in the admin panel. |
data-single-conversation | "true" | — | Optional. Shows only the conversation this browser holds and hides the list of past conversations. |
If your site is a single-page app, see Install in a single-page app.
Content Security Policy
Section titled “Content Security Policy”If your site sends a Content-Security-Policy header, allow the AgentMySite hosts:
script-src 'self' https://widget.agentmysite.com;connect-src 'self' https://api.agentmysite.com;frame-src https://widget.agentmysite.com;Without connect-src, the widget fails silently because it can’t reach the API.
Next steps
Section titled “Next steps”Was this page helpful?
Thanks for the feedback.